
 Publishing
 Content
AutoBuilds: Quickstart
The shortest path from a list of URLs to a launched campaign network.
For more information, like the logic behind these decisions, how to further influence AutoBuilds, see Deepdive on AutoBuilds.
1. Start the Build
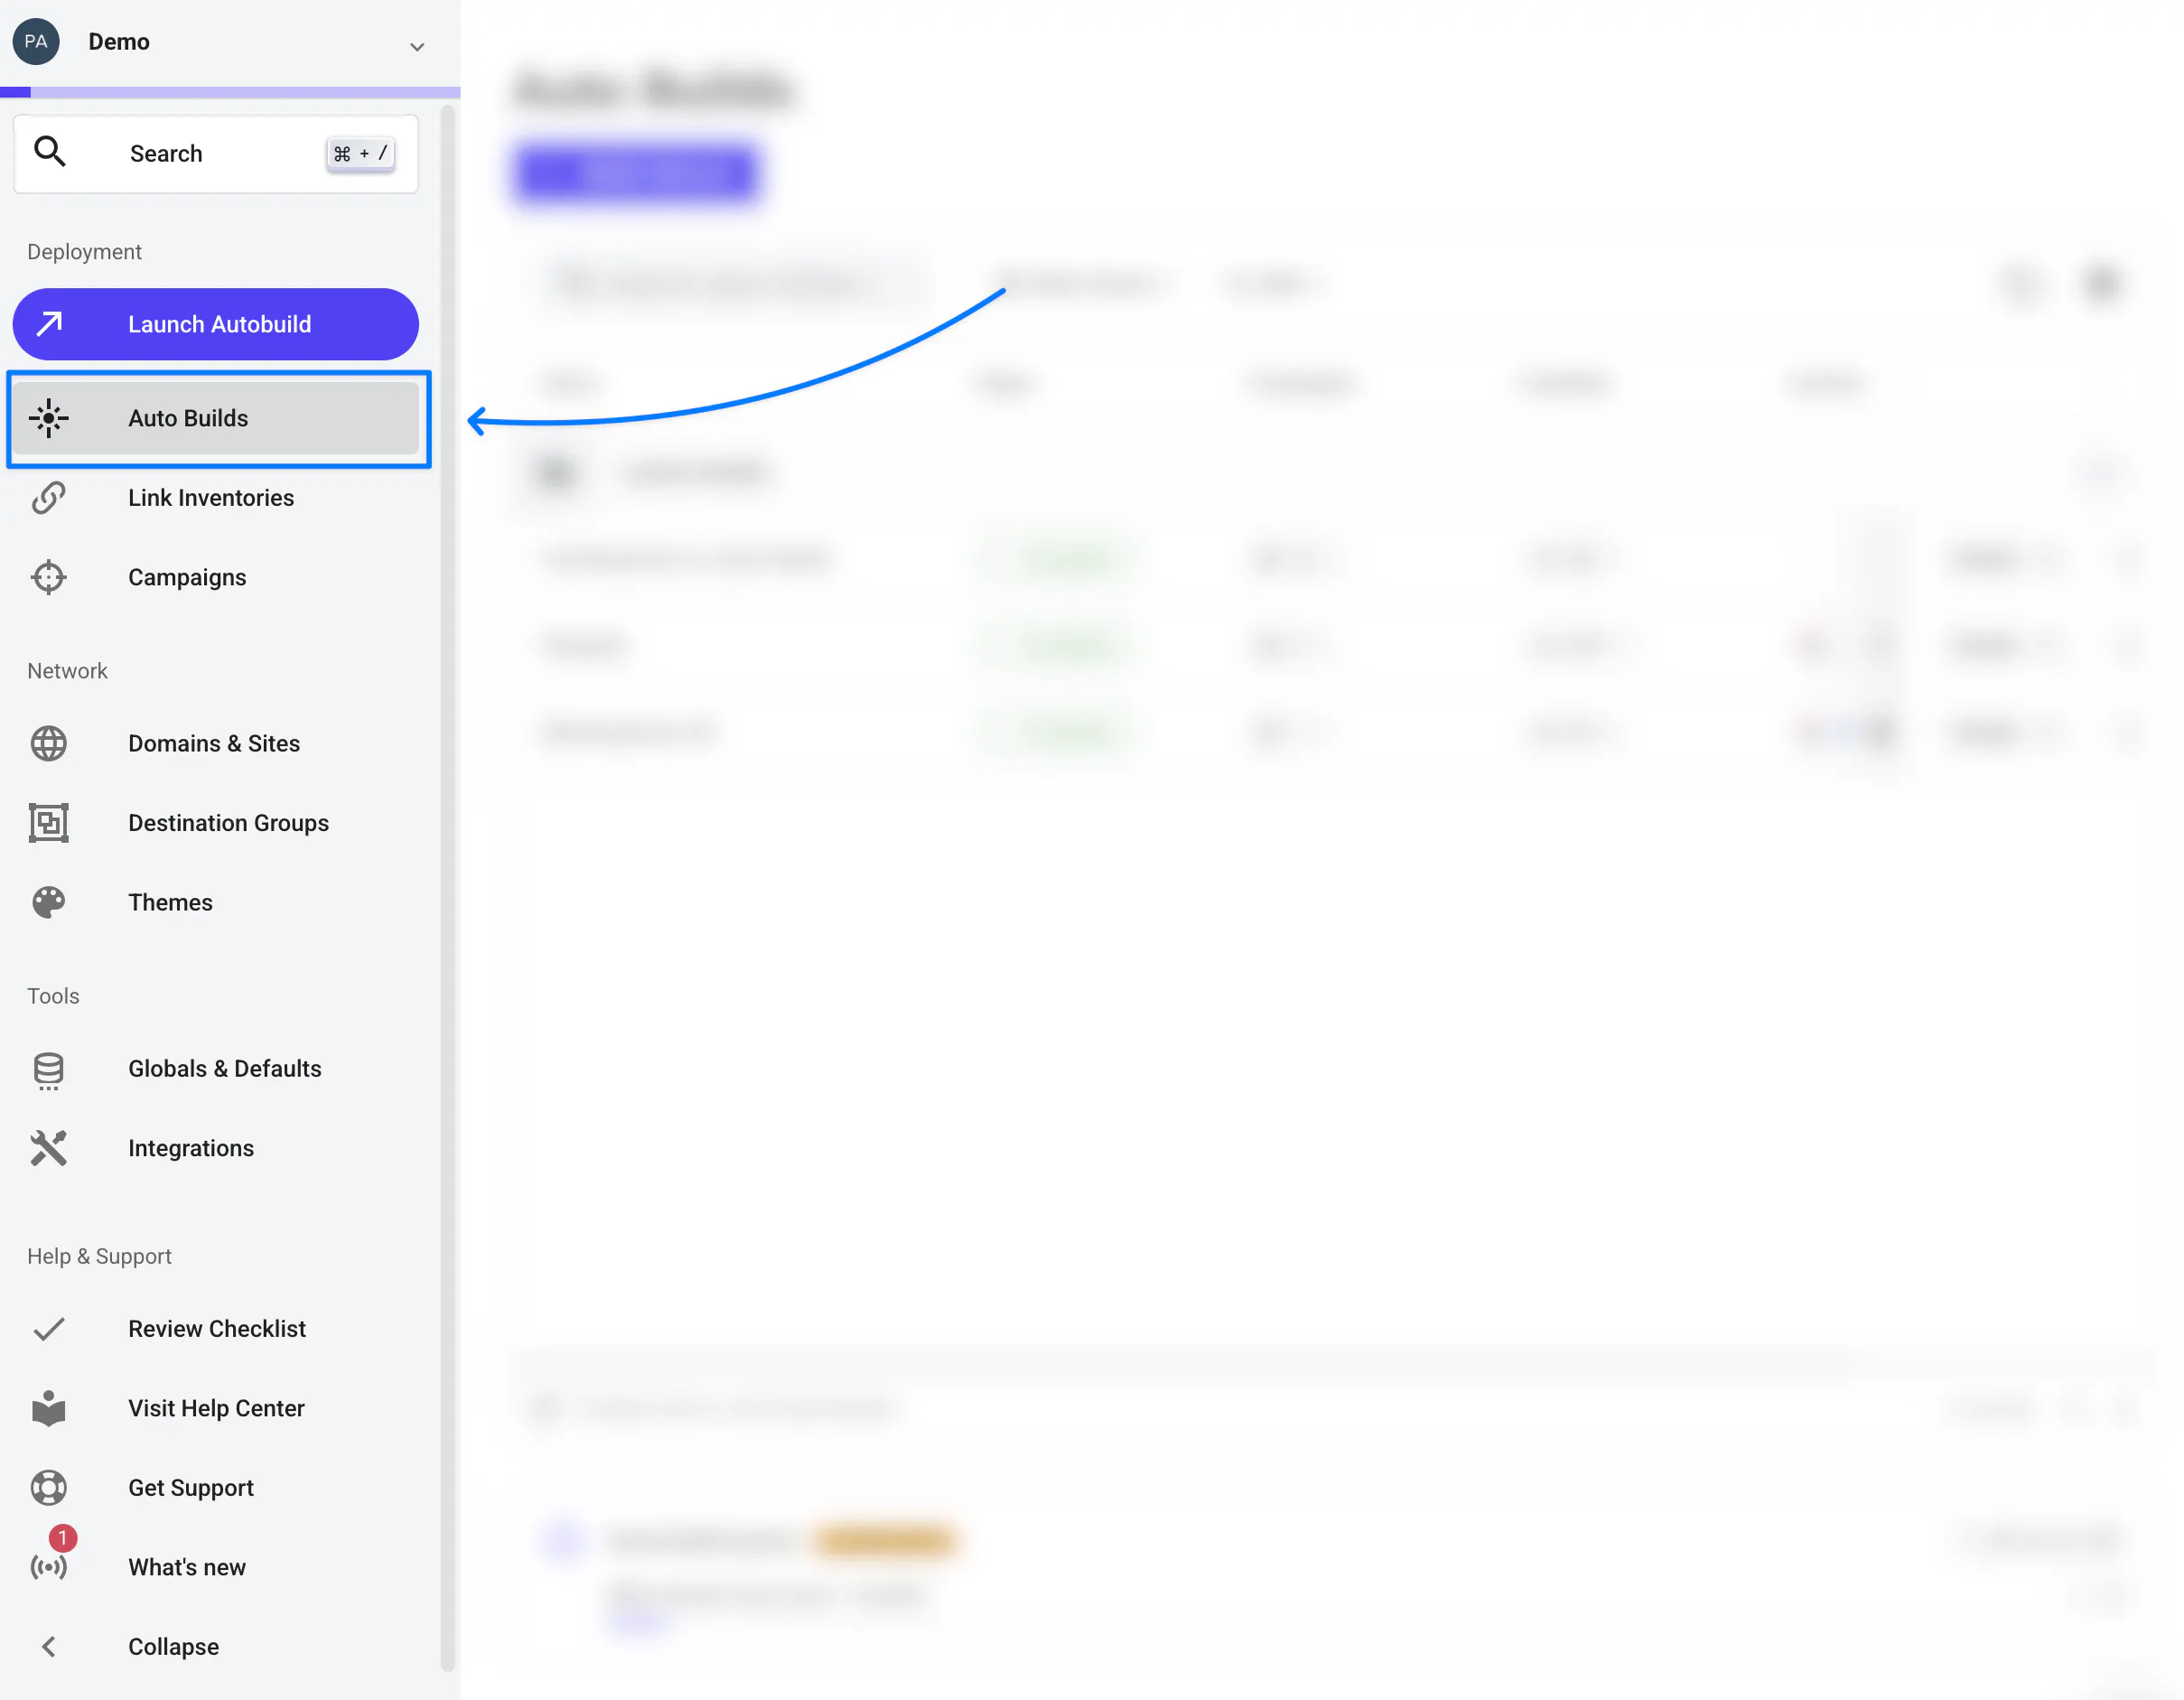
First, on the Auto Builds page, click New Build.
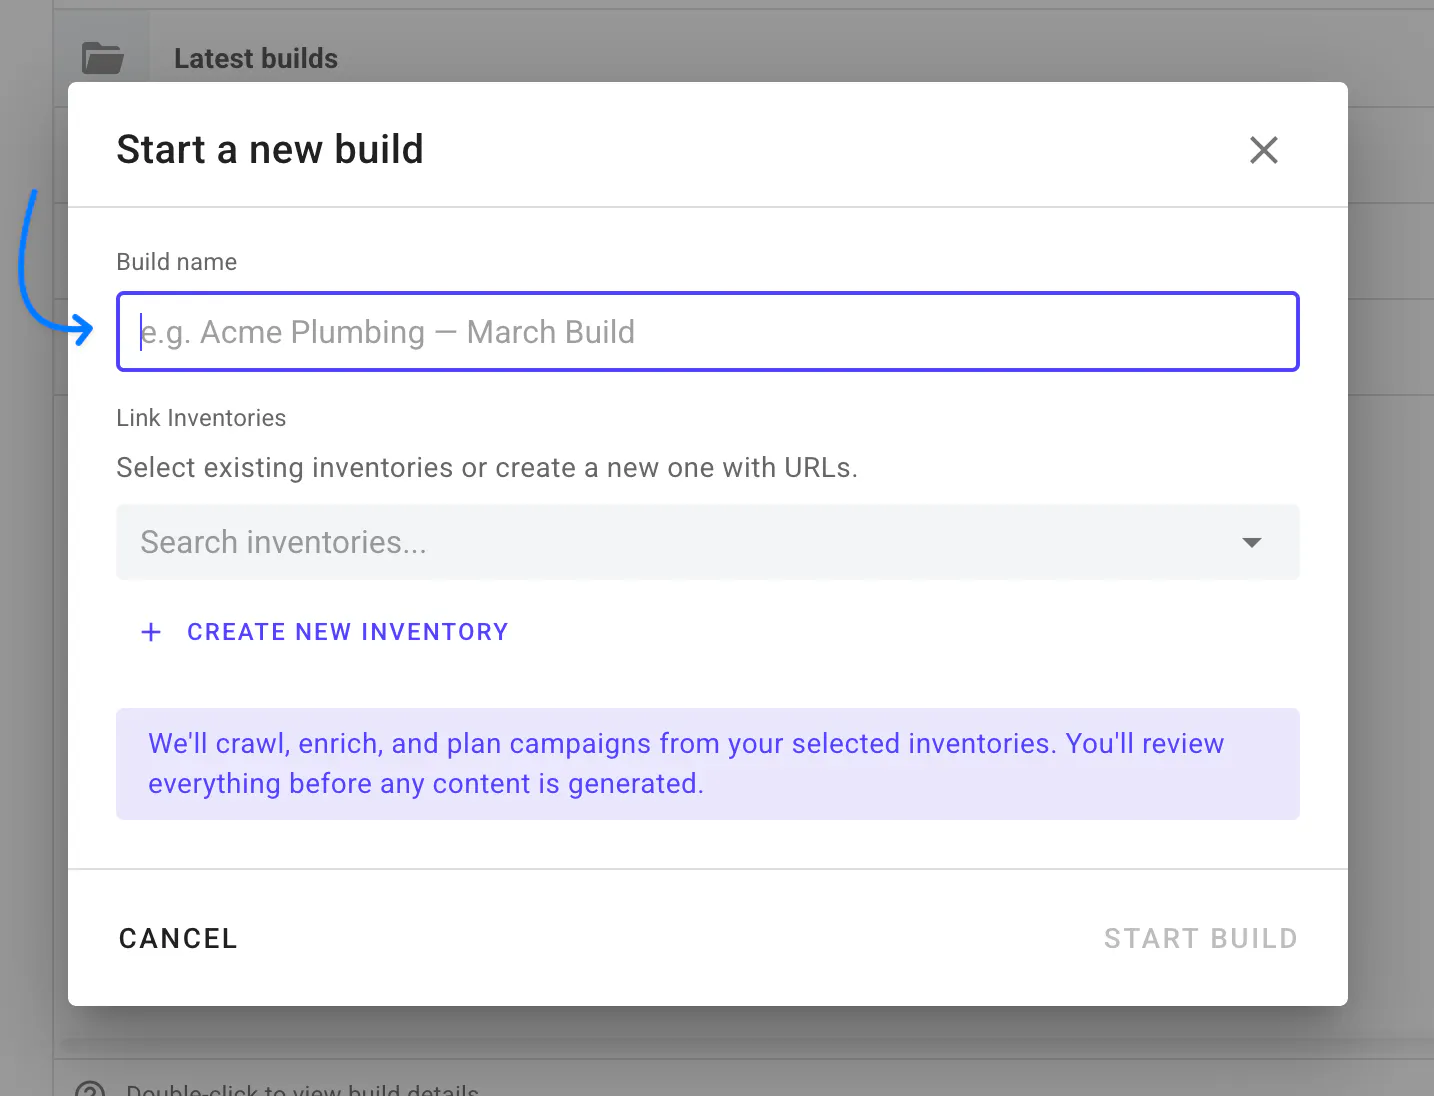
Second, enter a Build name.
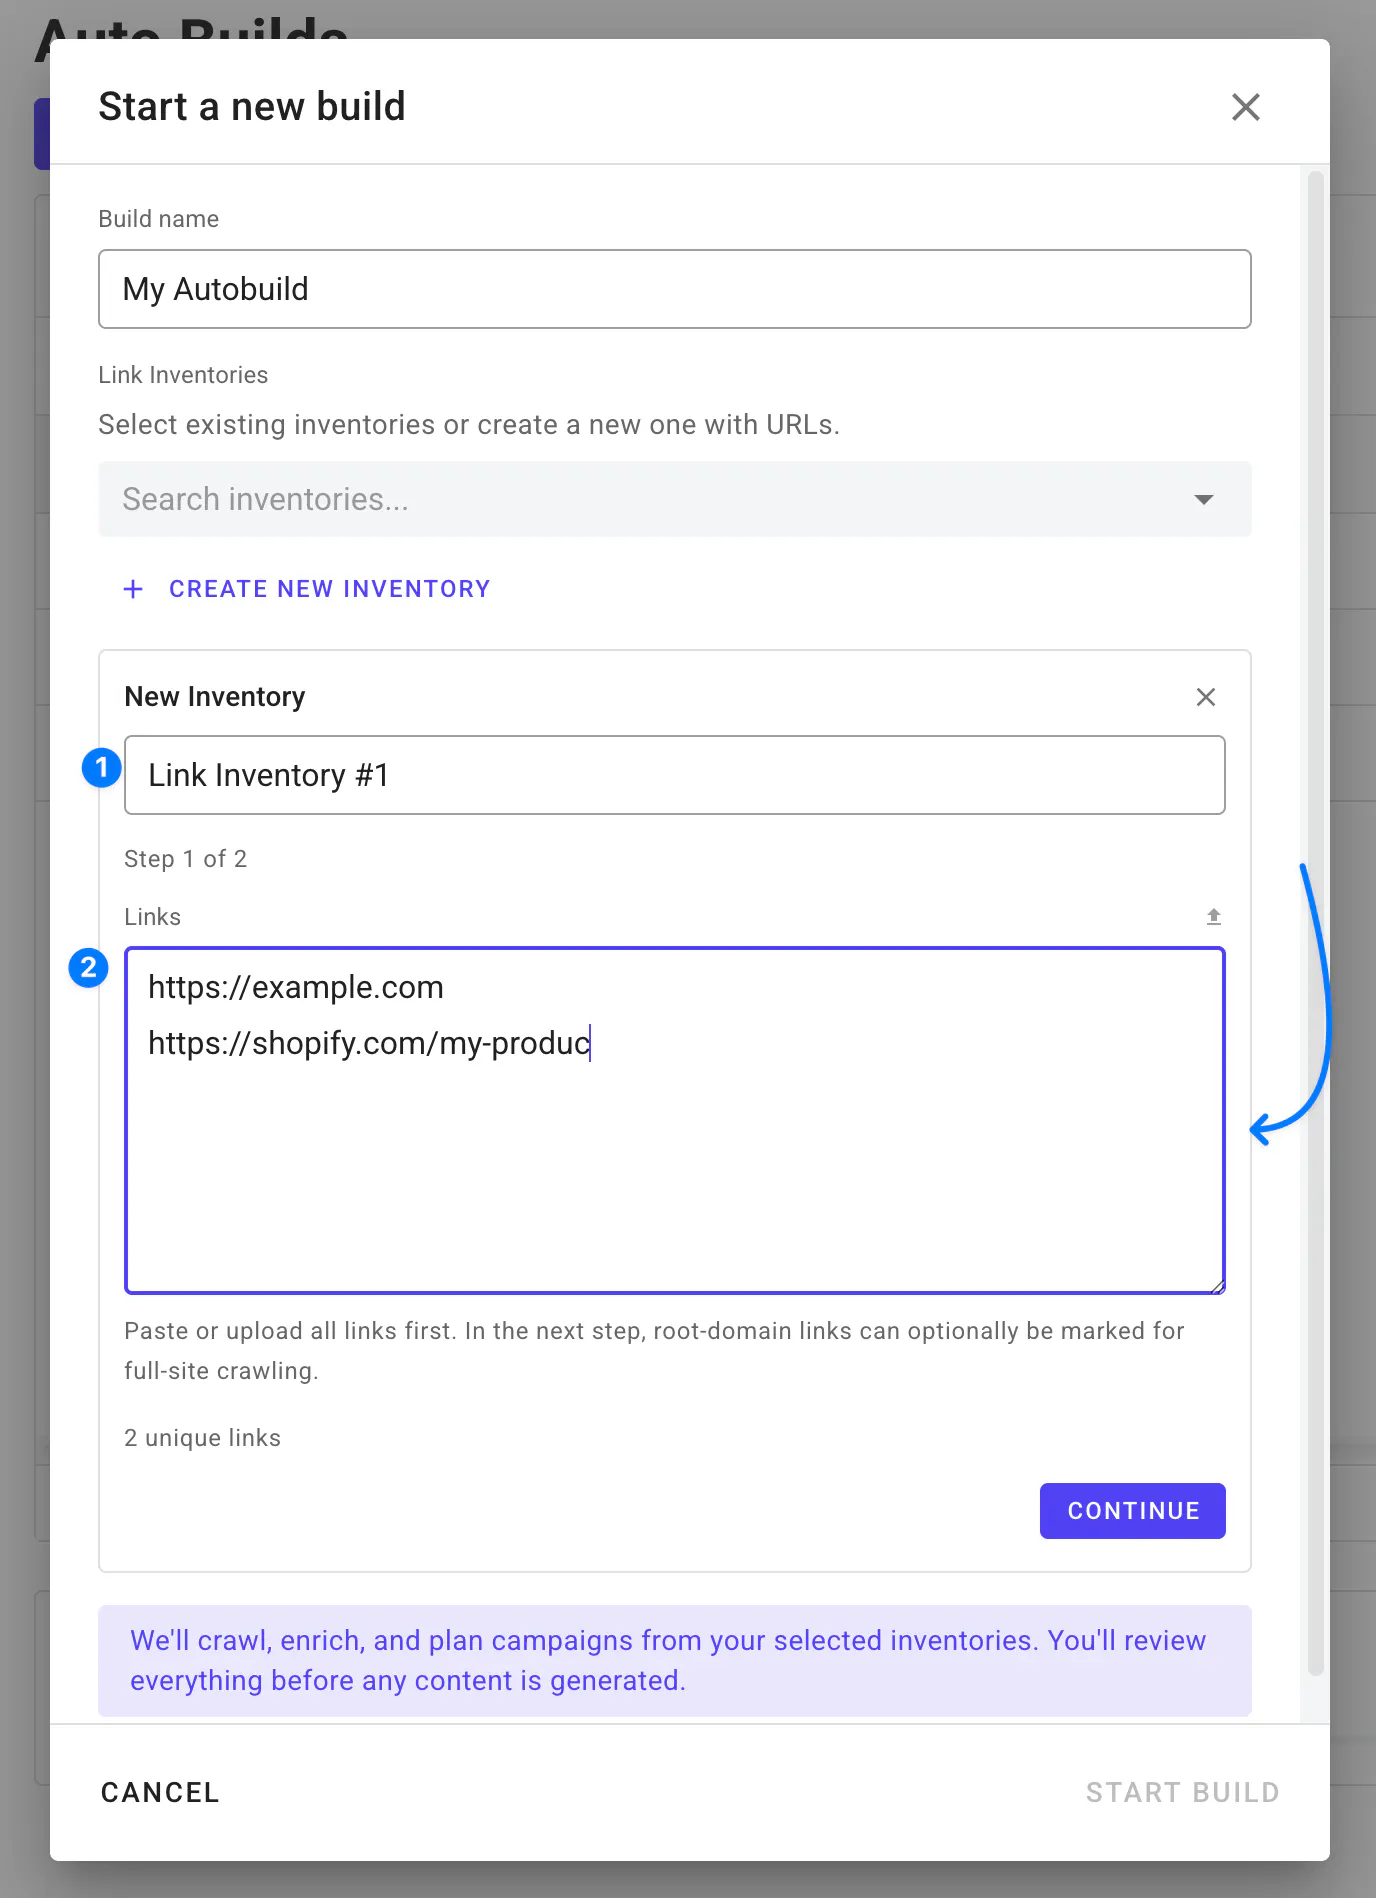
Third, click Create new inventory and enter an Inventory name.
Paste the URLs you want links built to, one per line, and click Continue.
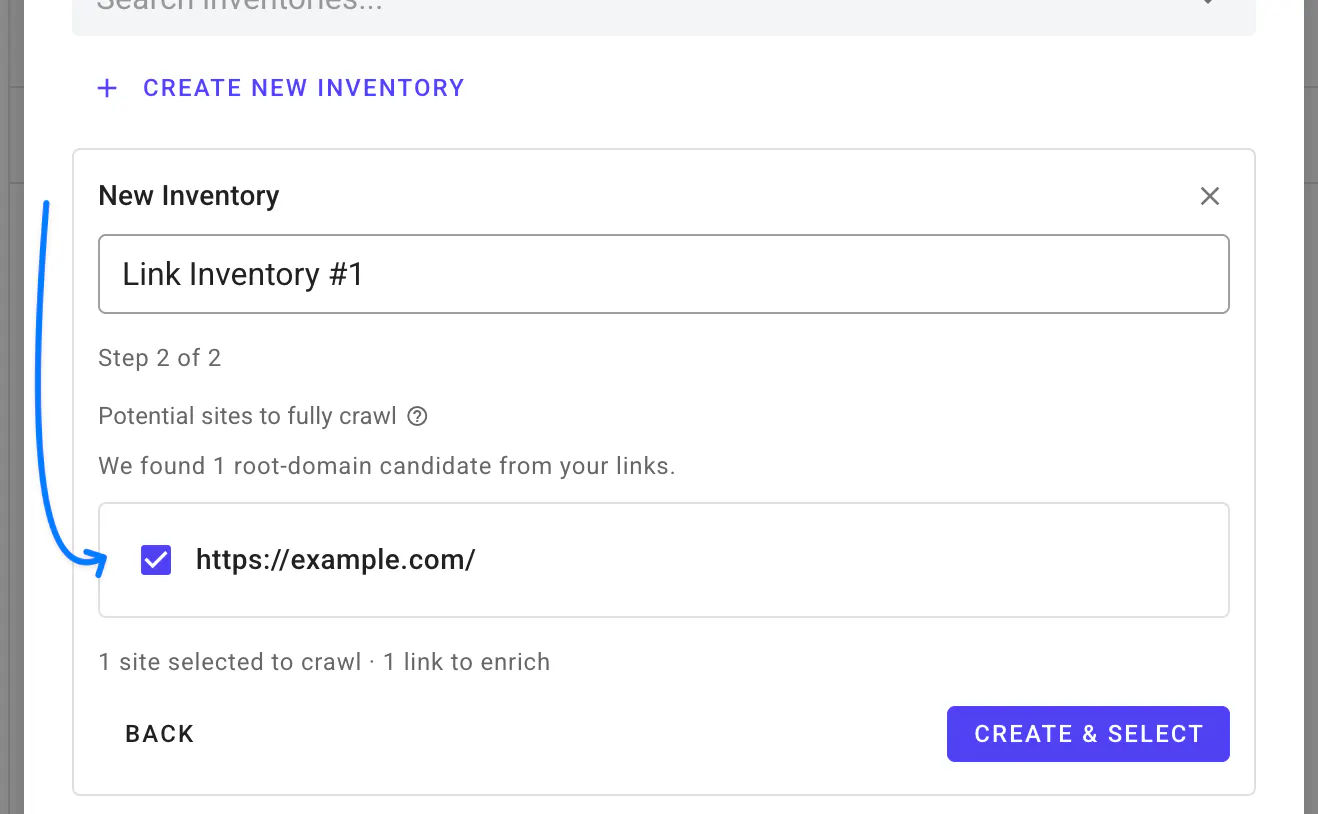
Fourth, if any of your links are root domains, they're listed as sites to crawl — leave the selection as it is and click Create & Select.
Finally, click Start Build.
The Build now crawls and enriches your links, then plans your campaigns. You can leave the page — the Build card shows Review now when it needs you.
2. Review pages (only if asked)
If the Crawl & Enrich stage asks you to review crawled pages:
First, click Open Link Inventory.
Then, click Continue — enrich selected.
3. Approve the plan
When the Build shows Awaiting Review:
First, open the Review stage.
Then, click Approve All or Approve specific campaigns.
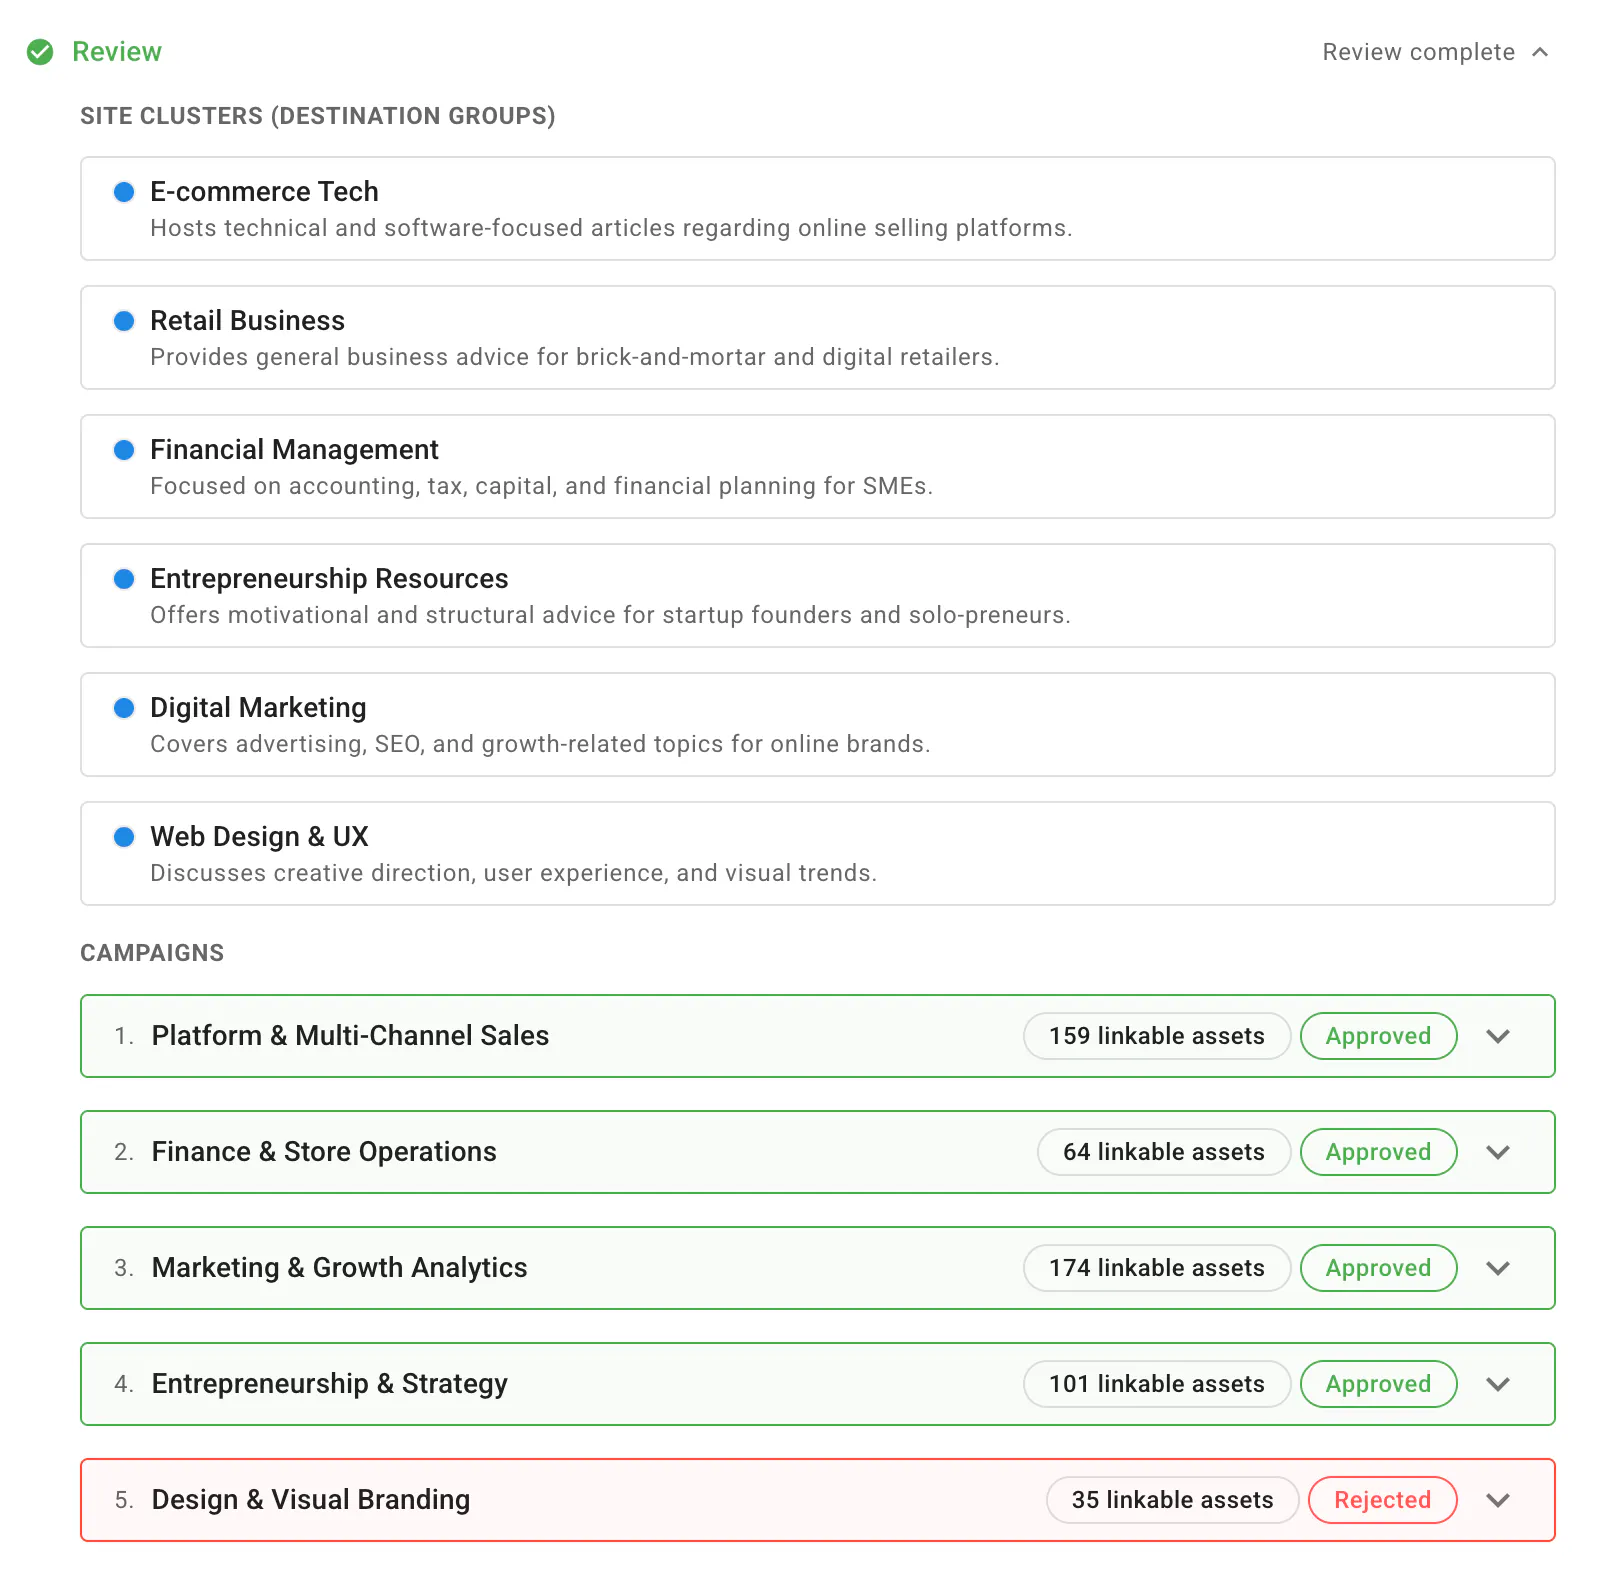
Content generation starts automatically and runs on its own.
4. Provision the sites
When generation is done, open the Provision stage:
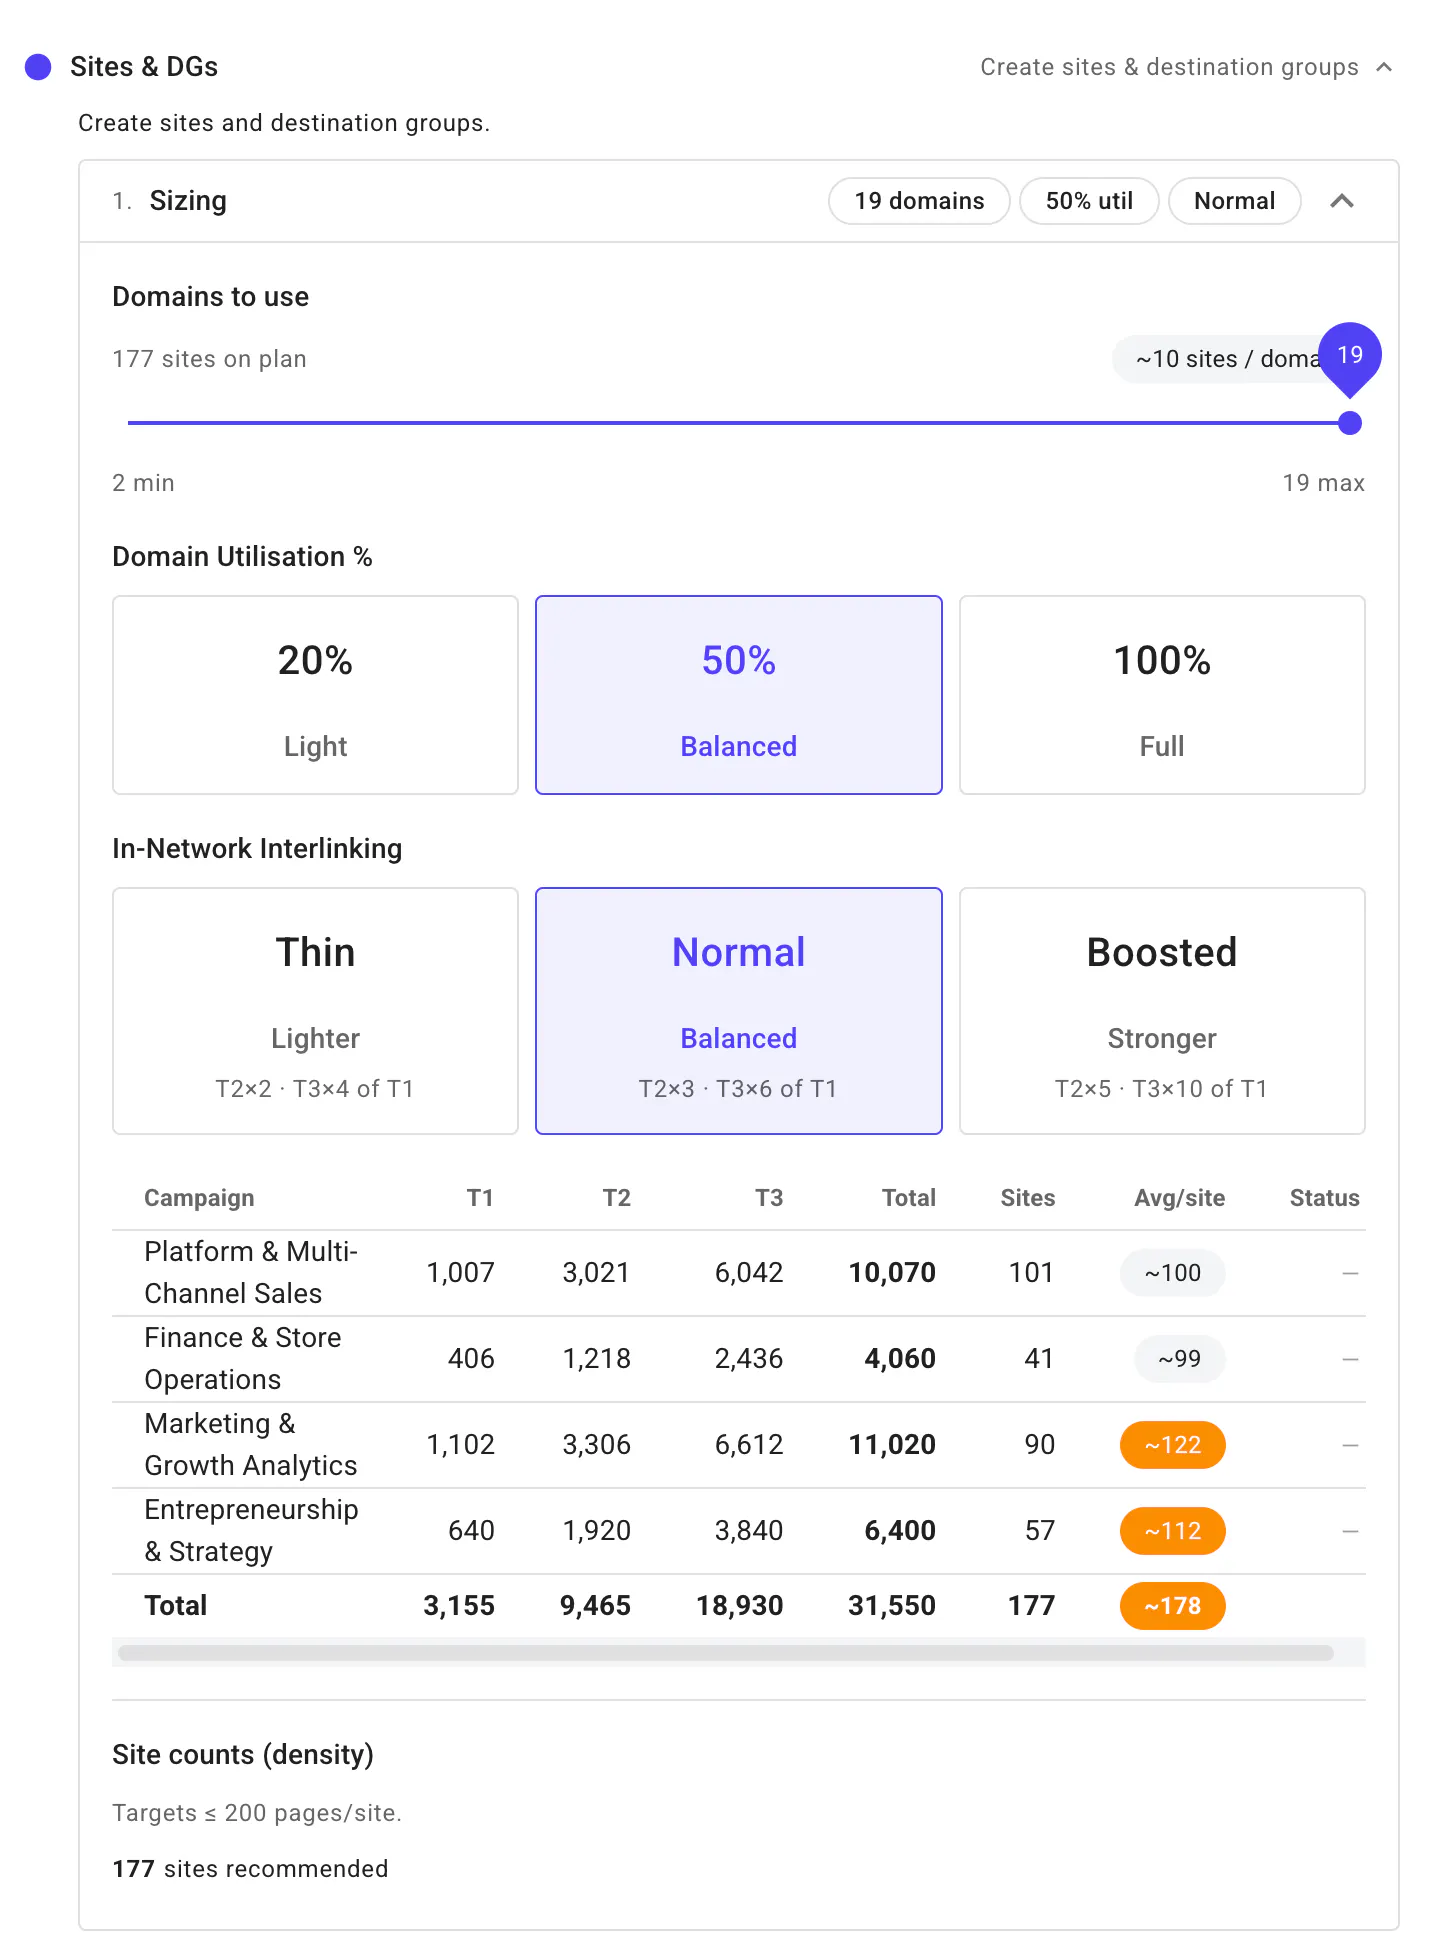
First, under Sizing, keep the defaults, or adjust how deep and wide your Autobuild is.
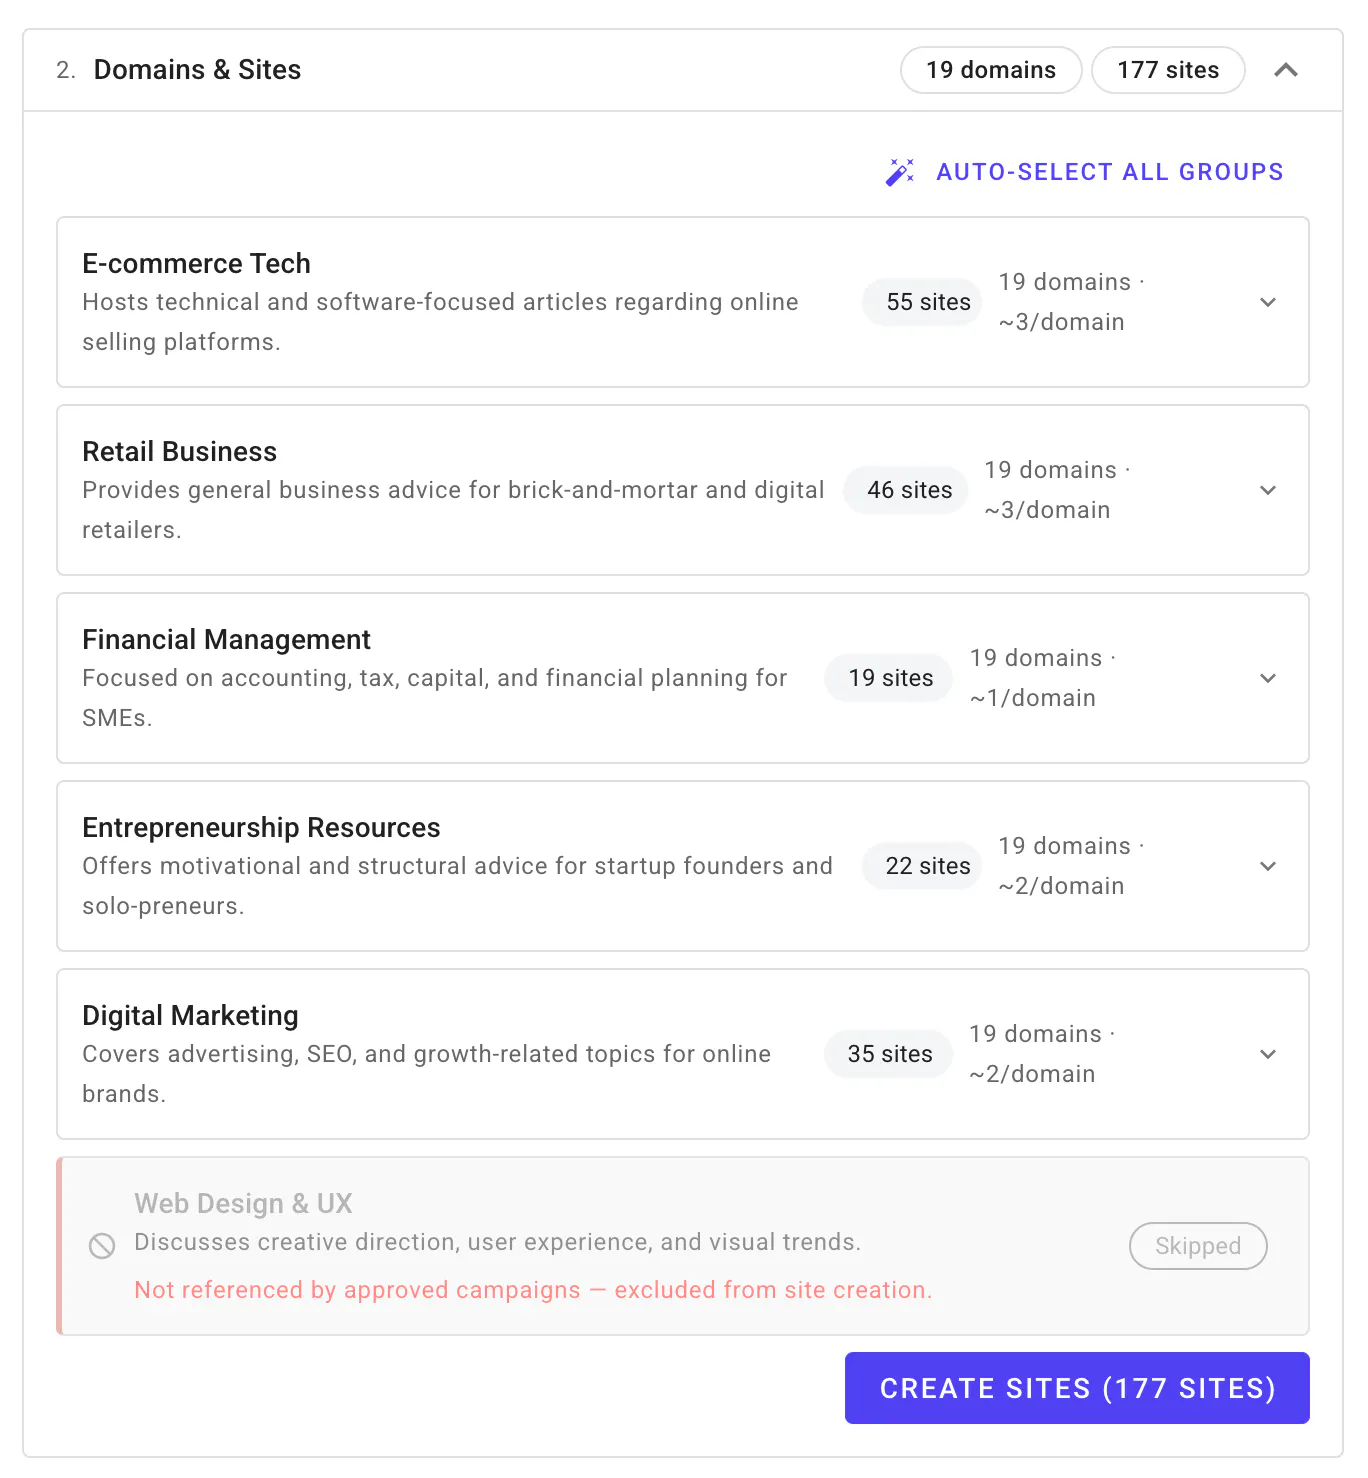
Then, under Domains & Sites, click Auto-select all groups or select for each group the domains you want to use.
5. Launch
First, open the Launch stage and keep the default Posting Schedule, or increase and decrease as needed.
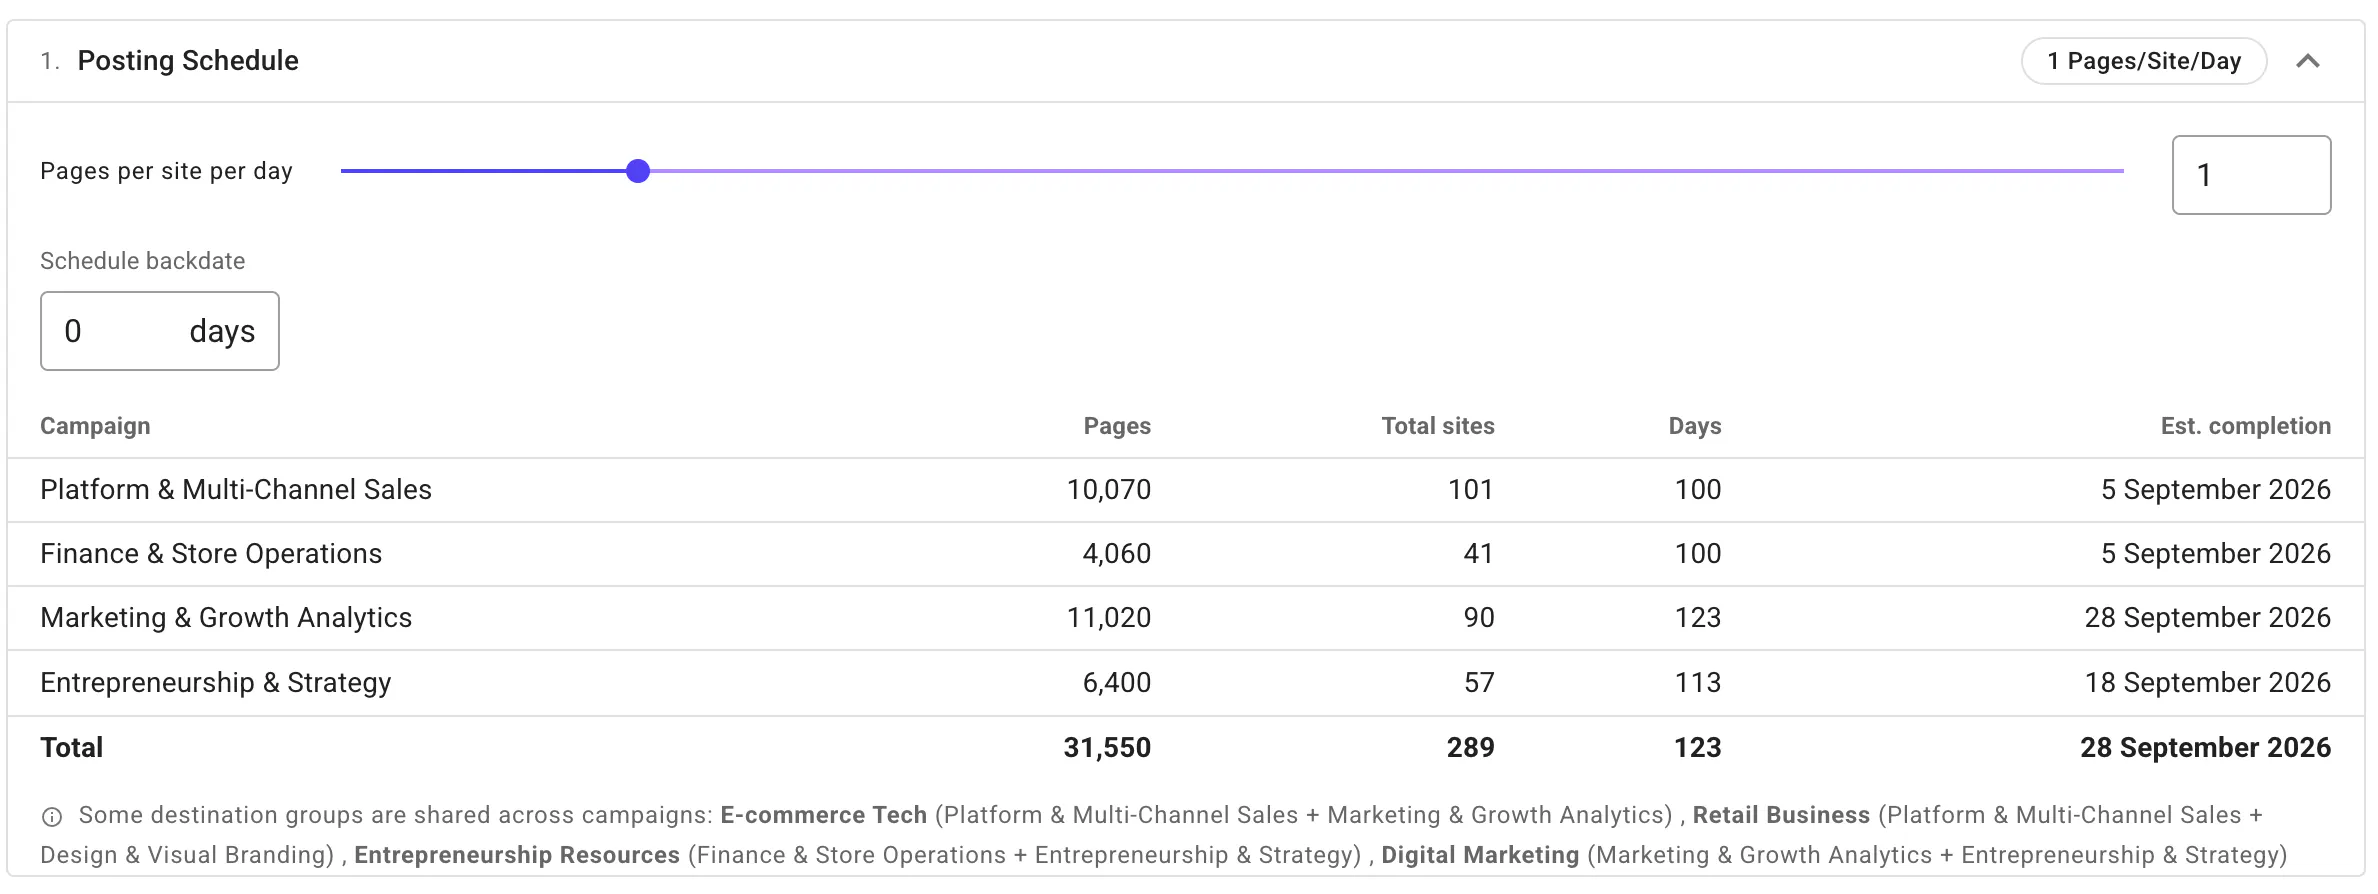
Then, click Launch on each campaign to finalise and create them, and begin posting the pages to the newly created site groups.
Done!
Your campaigns are live and appear in Publishing, publishing pages on their schedule.
To learn more about each part of AutoBuild, you can read more here.
Learn about site groups and domains here.
Learn about editing campaigns here.